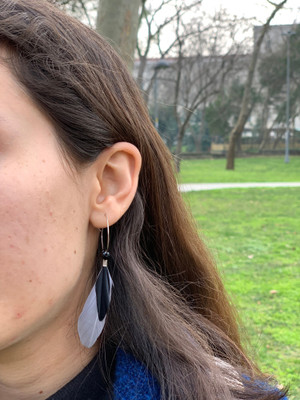
Give a try to the all new form of ear piercing, Get your conch pierced!
2019 Apr 14th
Looking forward to try an unusual form of body piercing?
While piercings have been a great way to express yourself, the trend seems to be quite common these days. In such a situation, catching up with fashion world acquires trying out something new and refreshing. These days even celebrities are going gaga over different form of piercings. No more it is constrained to pierced ears, nose, and tongue. They are experimenting with different ideas. One of them is conch piercing.
Hence, when you want to add another piercing to your ear, but don’t want to go for earlobes, this can be a good option. To give you a better detail about this latest style, here is the comprehensive guide to help you turn into an expert on this type of piercing. Read on.
Conch Piercing- what is it?
Basically, a conch piercing is a type of ear piercing where you get the cartilage of the middle portion of your ear pierced. It is the spot which covers largest area of ear cartilage and the name arrives from the way it appears, i.e. similar to a conch shell. Now you can get an inner conch piercing or an outer conch piercing, depending on your choice. When done to the lower part, it is referred to inner conch, and on the other hand the upper part is termed as outer conch.
Conch Piercing- understanding the process!
You must start the process searching for an experienced piercer. Make sure you verify everything about their certifications and dedication to hygiene and safety. Once you have done this, you are all set to get a conch piercing done.
- Cleaning: It is your piercer who will prepare your ear for the procedure. Initially, he will be cleaning your ear with a disinfectant. It is an important step to avoid getting a preventable infection.
- Marking: The next step includes marking the area with the help of a pen or a surgical marker. It is crucial step to help make the placement as precise as it could be.
- Numbing: You cannot skip this step if you fear of pain. Actually, piercers use a needle like object to create a space for the jewelry. And this is going to be painful. Yes, especially, if you are someone with lower threshold, you need to use a topical anesthetic like NumbSkin cream. Application of this lidocaine based solution will desensitize your skin for some hours. Hence, you can get it done without any discomfort.
- Piercing: Coming to the most important step, the piercer will then inserting the needle to make the conch piercing. Once the needle goes through, the jewelry of your choice will be inserted. The entire process is not going to take more than a couple of minutes.
Now when you have got it done, and are ready to walk out of the piercing parlor, ensure to have a discussion for aftercare instructions with your piercer.
Conch piercing- aftercare guide!
For a proper aftercare, you should make sure that all the aftercare items are available in advance. It might not be a great idea to run to the drugstore right after having your piercing done. Being prepared ahead of time is a key to successful piercing. Basically, you need to grab some sea salt, Q-tips and cotton balls. These are essential to keep your conch piercing clean and away from infection. You can prepare the salt water solution at home as it is very easy to make. In one cup of hot water add one-fourth of a teaspoon of sea salt. Stir it nicely till the salt has dissolved and take a cotton ball and dunk it in the sea salt water. Use this cotton ball and hold up to your conch piercing. You can do the same using Q-tips too.


